Showing posts with label windows. Show all posts

Create a Bootable Windows PE RAM Disk on CD-ROM (Mini OS CD) - Walkthrough

February 23, 2016

Create a Bootable Windows PE RAM Disk on CD-ROM

This walkthrough describes how you can create a bootable Windows® PE RAM disk on CD or DVD. Windows PE RAM enables you to start a computer for the purposes of deployment and recovery. Windows PE RAM boots directly into memory, enabling you to remove the Windows PE media after the computer boots.

Step 1: Set up a Windows PE build environment

In this step, you create a required directory structure that supports building a Windows PE image.

To set up a build environment

  1. On your technician computer, click Start, point to All Programs, point to Windows OPK or Windows AIK, right-click Deployment Tools Command Prompt, and then select Run as administrator.
    The menu shortcut opens a Command Prompt window and automatically sets environment variables to point to all the necessary tools. By default, all tools are installed at C:\Program Files\<version>\Tools, where <version> can be Windows OPK or Windows AIK.
  2. At the command prompt, run the Copype.cmd script.
    The script requires two arguments: hardware architecture and destination location. For example,
    copype.cmd <architecture> <destination>
    where <architecture> can be x86, amd64, or ia64, and <destination> is a path to a local directory. For example,
    copype.cmd x86 C:\winpe_x86
    The script creates the following directory structure and copies all the necessary files for that architecture. For example,
    \winpe_x86
    \winpe_x86\ISO
    \winpe_x86\mount
  3. Copy the base image (Winpe.wim) to the \Winpe_x86\ISO\sources folder and rename the file to Boot.wim.
    copy C:\winpe_x86\winpe.wim C:\winpe_x86\ISO\sources\boot.wim

Step 2: Add additional customizations

This step is optional, but recommended. Using ImageX, you can add applications and scripts to your Windows PE image that you might need while working in Windows PE. ImageX is a tool for capturing and applying images during deployment scenarios.

To add an application or script

  • At a command prompt, enter the following ImageX command:
    copy "C:\program files\<version>\Tools\<architecture>\imagex.exe" C:\winpe_x86\ISO\

    where <version> can be Windows OPK or Windows AIK, and <architecture> can be x86, amd64, or ia64. In both of the previous examples, the tools are not loaded into memory during a Windows PE RAM boot. The media must be available to access the tools.

Step 3: Create a bootable CD or DVD

To create a bootable CD, you must use CD-recording software that unpacks the .iso file and burns it to a CD. Merely copying the .iso file to the CD will not work.

Note: The Oscdimg tool is not supported on an Itanium-based computer running Windows Server 2003.

To create a CD or DVD

  1. On your technician computer, enter the following command to create an image (.iso) file for a BIOS-based computer. For example:
    Oscdimg -n -bC:\winpe_x86\Etfsboot.com C:\winpe_x86\ISO C:\winpe_x86\winpex86.iso

    where C:\winpe_x86\ISO is the location of the source files, and C:\winpe_x86\winpex86.iso is the destination .iso file.
    -or-
    For UEFI, replace Etfsboot.com with Efisys.bin, specify the EF platform ID, and add the following Universal Disk Format (UDF) options. For example:
    Oscdimg -bC:\winpe_x86\Efisys.bin -pEF -u2 -udfver102 C:\winpe_x86\ISO C:\winpe_x86\winpex86uefi.iso

    -or-
    For either BIOS or UEFI, enter the following command. For example:
    Oscdimg -m -o -u2 -udfver102 -bootdata:2#p0,e,bC:\winpe_x86\Etfsboot.com#pEF,e,bC:\winpe_x86\Efisys.bin C:\winpe_x86\ISO C:\winpe_x86\winpex86uefi.iso

    where this command starts the Etfsboot.com boot file for a BIOS image, and then starts the Efisys.bin boot file for a UEFI image.
  2. Burn the image onto a CD or DVD.

Next Step

You can also place Windows PE RAM on other bootable media, such as a USB flash drive or hard disk.

HP Data Protector - TSM Insufficient system resources exist to complete the requested service

February 23, 2016
TSM Insufficient system resources exist to complete the requested service


Sample Error Log :
ANS9999E ntrc.cpp(928): Received Win32 RC 1450 (0x000005aa) from FileRead(): ReadFile '\\xxxx\. Error description: Insufficient system resources exist to complete the requested service.


Solution:

>> Edit the dsm.opt file by adding the param "MEMORYEFFICIENTBACKUP YES".
>> Save it.
>> Try a manual backup and check if the backup completes.

If not, this error needs attention from platform end.

>> Windows OS has the paging file space memory that needs attention.
>> Issue can be resolved by adding/modifying "PoolUsageMaximum & PagedPoolSize" in registry

For more info, please refer the article from microsoft.

Your backup should be successful, once this is fixed.

Resolve System Restore Disabled By Group Policy Error In Windows

August 05, 2015
The System Restore feature in Windows is useful for restoring your PC back to older settings in case some application or settings start hampering its functioning.

Resolve System Restore Disabled


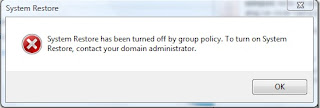
If you get the error, “ System Restore has been turned off by group policy. To turn on System Restore, contact your domain administrator “ while trying to access system restore then it could be possible that your firm’s IT department(if it’s your office workstation) has blocked it, or it got turned off automatically due to some reason.


Error Resolved with following simple steps. 

Method 1: 

Enable System Restore Configuration Interface through Group Policy Editor.


Step 1. Click Start button, click Run and type gpedit.msc.
Step 2. Expand Computer Configuration and then expand Administrative Templates.
Step 3. Expand System, and then click System Restore.
Step 4. Double click on Turn off System Restore.
Step 5. On the Setting tab, select Disabled.
Step 6. Double-click Turn off Configuration, and then on the Setting tab, select Disabled.
Step 7. Exit the editor and reboot your PC.


Method 2: 

Note: Make sure that you backup your registry using File->Export before you attempt to make any changes.

Step 1. Press Start start button. Click Run. Type regedit and click OK.
Step 2. On the registry editor double click on HKEY_LOCAL_MACHINE folder to expand it.
Step 3. Expand SOFTWARE folder.
Step 4. Expand Policies> Microsoft> Windows NT> SystemRestore.
Step 5. On a right panel right click on DisableConfog and DisableSR and select delete option from right hand menu.
Step 6. Exit the editor and reboot your PC.

These two method are work well on home editions and professional versions of Windows XP and higher.

After restarting your PC, Go to start button and type System Restore in a search box (In Windows 7,8, Vista).

System Restore window will appear now.


That was how you resolve System Restore disabled by group policy error in Windows.


15 Must Know Windows Run Commands - Updated

August 05, 2015
On the Microsoft Windows operating system, the Run command is used to directly open an application or document whose path is known.

15 Must Know Windows Run Commands - Updated


We will show up you 15 awesome Run commands that’d helps you to bypass a series of clicks, thereby making things faster in your daily usage of Windows.


Do note that the Run hasn’t disappeared in Windows 8 either. It might not show up like it did in its predecessors, but a simple Win+R keystroke would bring it up. Hence knowing how to use it is only going to help you.

run-cmd.jpg


Note: To run these commands, press Win+R button to open the Run box, type in the command you want to run and press the enter key.

Here are the Commands start from :


1. cleanmgr

To do a disk cleanup with a simple steps which is having a default program, no need to use any third party applications to clean your system (temp, Internet cache junk... etc.)

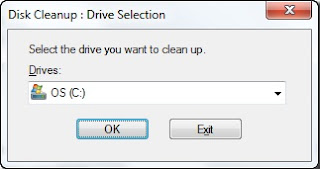
Probably, the easiest way to clean up the junk files accumulated in your computer. Run the command to open up the Windows Disk Cleanup Manager, select the drive you want to clean and click ok. Computer will then scan the particular drive for junk files and give the option to clean them.

cleanmgr

2. %userprofile%

Just like the previous command, this will open up the user profile directory for the particular user. You can access your picture, music, videos and other personal folders easily from here.

3. control

If you want to open your system Control Panel, this command will open it up for you directly. You’ll be surprised how few people know this one. So many of my so called geeky friends had no notion about this one.

We will be seeing how to open certain Control Panel settings directly as we proceed.

4. %programfiles%

We have to open program files most of the time to run and manage installed applications. This command will open your Program Files folder directly no matter on which drive Windows is installed on your computer. It’s better than opening Windows Explorer and then navigating to the folder manually.

5. compmgmt.msc

The command will open Computer Management, directly which you open conventionally by right-clicking on My Computer (or Computer), and selecting Manage. One can manage shared folders, manage disk services and take care of other management stuff using that window.

6. firewall.cpl

Want to disable or enable firewall quickly? Type in firewall.cpl in the Run box and press enter. Takes you right into Windows Firewall.

7. fsmgmt.msc

fsmgmt.msc

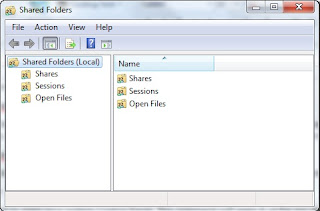
Keep track of all the shared folder and devices using this command. You can control sharing on your computer easily from here.

8. Open Web Browser (iexplore, chrome, firefox, opera)

These commands will open up Internet Explorer, Chrome, Firefox, and Opera on your system respectively if they are installed on your computer. That’s not all. You can append the URL of the website at the end of the browser name to open the website directly. For e.g. if you want to open Guiding Tech on Chrome, open Run Command and type in Chrome www.guidingtech.com and press enter. For the note, this command is my personal favorite (no points for guessing why).

9. msinfo32

system informaition


Probably, the easiest way to see your computer’s complete system info. Here you can find all the hardware and software information you will need to know about your computer.

10. Netplwiz

user Account


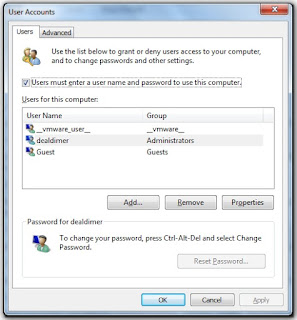
This command is useful for a multi-user computer. Administrators can directly open User Account advance configuration and configure any account they would like. Other users, however, can edit and change their personal account preferences.

11. osk

osk

Abbreviation for On Screen Keyboard, this one opens it on your computer screen. You can use these on screen keyboards to fight keyloggers while browsing through a shared public computer.

12. Logoff/shutdown

As the name speaks, these commands quickly logoff a user or shut down the computer respectively. You can also use “shutdown –a” to abort a system shutdown, but you have to be very quick while using the command.

13. utilman

We have seen how osk can open the on screen keyboard Windows utility, but if you want to use magnifier or a narrator, this command will open up the full utility manager for you.

14. wuapp


This command will open up the Windows Update Manager for you. You can then install and configure your Windows updates from here.

15. write

Just as the notepad command is used to open Windows Notepad, write launches the default Windows WordPad. Oh, you never knew this existed, did you? Try it out.


For more Usefull Commands - Visit Here


7 Best Free Email Clients: Free Replacement for Outlook

7 Best Free Email Clients: Free Replacement for Outlook

June 13, 2015

Here are 7 best free email clients that we have come across. If you use Microsoft Outlook, and want to switch to a free email client, then this list will provide you with good options. All of these are completely free, and full of features.


Thunderbird

Thunderbird is one of the most popular Email client. It comes from the makers of Firefox, and is packed with features. You can use Thunderbird with Gmail, and any other POP3, SMTP, IMAP. Thunderbird also supports email accounts provided by Microsoft Exchange Server.
Comes with tabbed interface to open multiple emails together.
  • Provides good security for your emails.
  • Advanced mail filters.
  • Works on Windows, Mac, and Linux.
  • Download Free Here.

Windows Live Mail

This is a free email client from Microsoft, and is a part of Windows Live suite. This is really good, and has good resemblance with Microsoft Outlook. It supports Hotmail, Gmail, Yahoo Plus, and many more.
  • Sync your calendar with Windows Live Calendar.
  • Access your mails offline as well.
  • Good security features, and spam protection.
  • Download Free Here.
This is a free email client from Yahoo. Unline any other free email client, it has one big advantage – yu can even check your Yahoo mail in Zimbra Desktop. Apart from that, it is extremely easy to configure your accounts in Zimbra Desktop.
  • Native account setup support for Yahoo, Gmail, Hotmail, and AOL.
  • Syncs Zimbra calendar with Yahoo and Gmail calendars.
  • Stores all the contacts in one place.
  • Supports multiple accounts.
  • Download Free Here.

SeaMonkey

SeaMonkey Project
SeaMonkey is a free internet application suite from makers of Firefox and Thunderbird. This is one integrated tool that includes email client, browser, feed reader, IRC Client, and HTML Editor.
  • Emails can be viewed in tabbed format.
  • Junk mail control.
  • Supports multiple email accounts.
  • Download Free Here.

Pegasus Mail

Pegasus Mail LogoThis is one of the oldest email clients. It is very feature rich, and still easy to use. One of the best part of Pegasus Mail client is that it works very well in LAN settings, and has special support for Novell NetWare LANs that allow it to operate intuitively and with almost no maintenance.
  • Supports SMTP, POP3, IMAP4, LDAP, PH.
  • Very secure – comes with advanced protection.
  • Very good spam protection.
  • Small in size, and uses very less system resources.
  • Download Free Here.
eM Client is a full featured communications suite that comes with a powerful email client, integration with Skype, and support for multiple calendars.
  • Native support for Gmail and Google Calendar.
  • Easily import data from MS Outlook, Outlook express, and Thunderbird.
  • Integration with Skype.
  • Download Free Here.
If you have a netbook, Free Mail Commander ideal free email client for you. It uses very less system resources. Still, it is feature packed.
  • Supports multiple aaccounts.
  • Powerful filtering and sorting.
  • Small in size.
  • Uses very less system resources.
  • Download Free Here.


Simple Shortcut to Use Hibernation

June 13, 2015
-->

Here's a Simple & quickie keyboard shortcut for those of you who like to put Windows XP into hibernation instead of the standard shutdown process.

How to Do :
  • Select Start | Turn Off Computer.
  • While in the Shut Down box, hold down the Shift key and hit the H key.
  • The computer will instantly hibernate.

Remember that Hibernate is useful because it saves the status of your Windows XP session (all the programs and documents you have open) to the hard drive, so it can automatically restore it the next time you power up.


-->