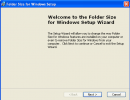
Folder Size Explorer Extension 2.4

Folder Size Explorer Extension 2.4

November 22, 2009
Folder Size for Windows 2.4 Review.

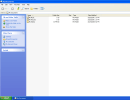
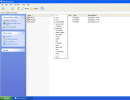
Folder Size for Windows adds a new column to the Details view in Windows Explorer. The new column shows not only the size of files, but also the size of folders.
It keeps track of which folders you view, and scans them in the background so you can see complete size of all files within the folder. It's very useful for cleaning up your disk. Once you get used to having that information available, a directory listing simply looks incomplete without it!
ADD FIELD
ADD FIELD
INSTALL
INSTALL
THE FIELD
THE FIELD


       Download Here  
 

MCSE Dream Tech Study meterial.

November 22, 2009


Part I: Managing and Maintaining a Microsoft Windows Server 2003 (Exam 70-290)
Chapter 1:
Managing and Maintaining Physical and Logical Devices
Chapter 2: Managing Users, Computers, and Groups
Chapter 3: Managing and Maintaining Access to Resources
Chapter 4: Managing and Maintaining a Server Environment
Chapter 5: Managing and Implementing Disaster Recovery

Part II: Implementing, Managing, and Maintaining a Microsoft Windows Server 2003 Network Infrastructure (Exam 70-291)
Chapter 6:
Administering DNS in a Windows Server 2003 Network
Chapter 7: Implementing, Managing, and Maintaining IP Addressing
Chapter 8: Implementing, Managing, and Maintaining Name Resolution
Chapter 9: Implementing, Managing, and Maintaining Routing and Remote Access
Chapter 10: Managing Network Security
Chapter 11: Maintaining a Network Infrastructure
 

Part III: Planning and Maintaining a Microsoft Windows Serve
r 2003 Network (Exam 70-293)
Chapter 12:
Implementing Server Security
Chapter 13: Planning, Implementing, and Maintaining a Network Infrastructure
Chapter 14: Planning, Implementing, and Maintaining Routing and Remote Access
Chapter 15: Maintaining Server Availability
Chapter 16: Planning and Maintaining Network Security
Chapter 17: Planning and Maintaining a Security Infrastructure
 

Part IV: Planning, Implementing, and Maintaining a Microsoft Windows Server 2003 Active Directory (Exam 70-294)
Chapter 18:
About Directory Services
Chapter 19: Planning and Implementing an Active Directory Infrastructure
Chapter 20: Planning and Implementing User, Computer, and Group Strategies
Chapter 21: Managing and Maintaining an Active Directory Infrastructure
Chapter 22: Planning and Implementing Group Policy
Chapter 23: Managing and Maintaining Group Policy


Download Here


Microsoft Office Visio 2007 Software Download

Microsoft Office Visio 2007 Software Download

November 22, 2009
MS Visio 2007 software.
http://office.microsoft.com/global/images/default.aspx?assetid=ZA102633931033


Office Visio 2007 provides a wide range of templates — business process flowcharts, network diagrams, workflow diagrams, database models, and software diagrams — you can use to visualize and streamline business processes, track projects and resources, chart organizations, map networks, diagram building sites, and optimize systems.
Integrate diagrams with Office Visio 2007
Use the wide range of diagram types in Office Visio 2007 to better understand complex processes, resources, and systems.


Download Software.

Part1      Part2      Part3
Try to open Local disk (c:, d:) get open with dialog box

Try to open Local disk (c:, d:) get open with dialog box

November 21, 2009
This is the problem with autorun.inf file.
autorun.inf file need to delete from the drives is only the solution.

double click on any of local disk icons in my computer  getting a box saying "choose the program you want to use to open this file"
To resolve this problem
Follow the steps.

1) Go to the command promt

start Run and type CMD press enter.
Here command promt will opens.

2) C:\Documents and Settings\user>
Here commnad steps have fallow.
  : cd\
3)  : d:  (drive letter which is opens the " open with dialog box "
4)  : dir auto*
    Here Shows like
----------------------------------------------
D:\>dir auto*
Volume in drive D is New Volume
Volume Serial Number is E01B-F2EE

Directory of D:\

10/10/2009  05:39 PM               303 autorun.inf
               1 File(s)            303 bytes
               0 Dir(s)  516,780,961,792 bytes free
------------------------------------------------
5)  :attrib auto*
Here shows
------------------------------------------------
D:\>attrib auto*
SHR          D:\autorun.inf

Displaying the attributes for this file.
------------------------------------------------
6)  :attrib -S -H -R auto*

Here we removing the attributes for this file.
7)  :del autorun.inf
Here we deleting the autorun.inf file.
8)  close all windows and just restart the system

after restarting the system check the D drive is opens normally or not.
Diffidently the problem will solve

Do the same for all drives from command prompt.

Enjoy the tip and give comments
Manually uninstalling Symantec System Center.

Manually uninstalling Symantec System Center.

November 20, 2009

Manually uninstalling Symantec System Center

After a failed or incomplete installation of Symantec System Center, you are unable to successfully reinstall the software or uninstall using Add/Remove Programs. You need to manually uninstall Symantec System Center


Solution:
Symantec recommends that you use Add/Remove Programs in Windows Control Panel to uninstall or modify the installation of Symantec System Center.

If you cannot uninstall Symantec System Center by using Add/Remove Programs, use the steps in this document to remove Symantec System Center.

WARNING: In the following procedure, you will edit the Windows registry. Symantec strongly recommends that you back up the system registry before making any changes. Incorrect changes to the registry could result in permanent data loss or corrupted files. Modify only the keys specified. Read the document How to back up the Windows registry before proceeding. 

To manually remove Symantec System Center from the Windows registry

  1. Stop the Symantec System Center Discovery service.
  2. Click Start > Run.
  3. In the Run dialog box type:    regedit
  4. Click OK.

    WARNING: Follow the next two steps only if the condition described in the steps is met. If you delete a registry key that is used by another Symantec product, that product must be removed and installed again.

  5. If Symantec System Center is the only Symantec product on your computer, go to the following registry key:

    HKEY_LOCAL_MACHINE\SOFTWARE\INTEL\LANDesk\

  6. If Symantec System Center is the only Symantec product on your computer, delete the following keys:

    AMS2
    VirusProtect6

  7. Go to the following key:

    HKEY_LOCAL_MACHINE\SOFTWARE\Microsoft\MMC\NodeTypes\

  8. Delete each of the values below:

    {0A624A66-269C-11d3-80F4-00C04F68D969}
    {11B529F0-7697-11d2-B34C-00104B22D5DF}
    {5DD3E8C0-7763-11d2-B34C-00104B22D5DF}
    {5E07EBA4-B771-11d5-8152-00C04F68D969}
    {CED9D6EE-B91A-11d5-8153-00C04F68D969}
    {F01B4B50-775A-11d2-B34C-00104B22D5DF}

  9. Go to the following registry key:

    HKEY_LOCAL_MACHINE\SOFTWARE\Microsoft\MMC\SnapIns\
  10. Delete the following registry key:

    {0FD7D204-F362-11D2-80EB-00C04F68D969}
    {103363F4-69F9-11D2-B34C-00104B22D5DF}

  11. Go to the following registry key:

    HKEY_LOCAL_MACHINE\SOFTWARE\Microsoft\Windows\CurrentVersion\Uninstall\

  12. Delete the following keys:
    Symantec System Center
    {5F5A0389-C8D6-49D6-8812-9F7F439E72AC}


    WARNING: Follow the next four steps only if the condition described in the steps is met. If you delete a registry key that is used by another Symantec product, that product must be removed and installed again.

  13. If Symantec System Center is the only Symantec product on your computer, go to the following key:

    HKEY_LOCAL_MACHINE\SOFTWARE\INTEL\DLLUsage\

  14. If Symantec System Center is the only Symantec product on your computer, delete the VP6 key.
  15. If Symantec System Center is the only Symantec product on your computer, go to the following key:

    HKEY_LOCAL_MACHINE\SOFTWARE\

  16. If Symantec System Center is the only Symantec product on your computer, delete the following key:

    Symantec

  17. Go to the following key:

    HKEY_LOCAL_MACHINE\SYSTEM\CurrentControlSet\Services\

  18. Delete the following key:

    NSCTOP

  19. Go to the following key:

    HKEY_LOCAL_MACHINE\SOFTWARE\Microsoft\Windows\CurrentVersion\SharedDLLs

  20. In the right pane, delete the following values:

    C:\Program Files\Common Files\Symantec Shared\SSC\Transman.dll
    C:\WINNT\System32\CBA.DLL
    C:\WINNT\System32\Msgsys.dll
    C:\WINNT\System32\NTS.DLL
    C:\WINNT\System32\PDS.DLL


After you remove Symantec System Center from the Windows registry, restart the computer. Then, remove Symantec System Center files and folders.

"To remove Symantec System Center files and folders
"
  1. In Windows Explorer, delete the following folders:

    C:\Program Files\Common Files\Symantec Shared\SSC
    C:\Program Files\Symantec\Symantec System Center
    C:\WINNT\Installer\{5F5A0389-C8D6-49D6-8812-9F7F439E72AC}

  2. Go to the C:\WINNT\Installer folder, and delete the 3fb4f4.msi file.
  3. Go to the C:\WINNT\system32 folder.
  4. Delete the following files:

    CBA.DLL
    Msgsys.dll
    NTS.DLL
    PDS.DLL

  5. Go to the following folder:

    C:\Documents and Settings\All Users\Start Menu\Programs\Symantec System Center Console\
  6. Delete the Symantec System Center Console.lnk file.