Showing posts with label domain. Show all posts
6 Free Tools To Help You Run Windows Applications On Linux

6 Free Tools To Help You Run Windows Applications On Linux

June 28, 2011

6 Free Tools To Help You Run Windows Applications On Linux


When switching from Windows to a more secured Linux operating system, you may come up with many difficulties. Like for example you might not find the applications you needed for doing your daily work. Although you can find any and all the replacements of a Windows application on Linux, there is a way through which you can run your favorite Windows application on your Linux operating system. Here we have compiled a list of 6 free tools that will help you run your favorite Windows application on a Linux system or help you to run virtual PC on any Operating System.
You are welcome to share if you know more free tools that will help you run your favorite Windows application on a Linux 


wine
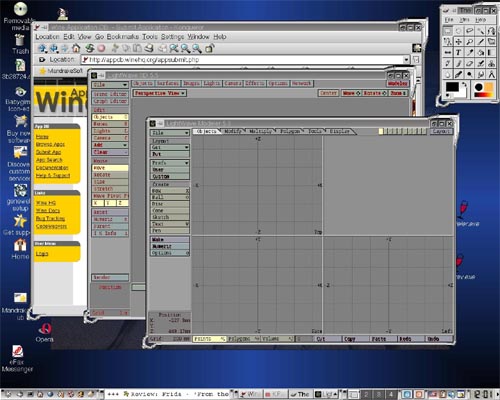
Wine is an Open Source implementation of the Windows API on top of X, OpenGL, and Unix. Think of Wine as a compatibility layer for running Windows programs. Wine does not require Microsoft Windows, as it is a completely free alternative implementation of the Windows API consisting of 100% non-Microsoft code, however Wine can optionally use native Windows DLLs if they are available. Wine provides both a development toolkit for porting Windows source code to Unix as well as a program loader, allowing many unmodified Windows programs to run on x86-based Unixes, including Linux, FreeBSD, Mac OS X, and Solaris.


VirtualBox

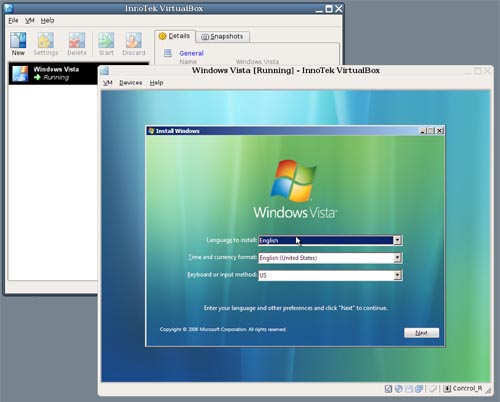
VirtualBox is an x86 virtualization software package, originally created by German software company innotek, now developed by Sun Microsystems as part of its Sun xVM virtualization platform. It is installed on an existing host operating system; within this application, additional operating systems, each known as a Guest OS, can be loaded and run, each with its own virtual environment. Supported host operating systems include Linux, Mac OS X, OS/2 Warp, Windows XP or Vista, and Solaris, while supported guest operating systems include FreeBSD, Linux, OpenBSD, OS/2 Warp, Windows and Solaris.
Qemu
QEMU is a generic and open source machine emulator and virtualizer. When used as a machine emulator, QEMU can run OSes and programs made for one machine (e.g. an ARM board) on a different machine (e.g. your own PC). By using dynamic translation, it achieves very good performances. When used as a virtualizer, QEMU achieves near native performances by executing the guest code directly on the host CPU. A host driver called the QEMU accelerator (also known as KQEMU) is needed in this case. The virtualizer mode requires that both the host and guest machine use x86 compatible processors.
Bochs
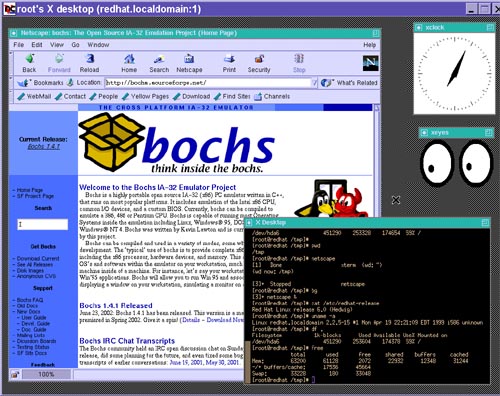
Bochs is a highly portable open source IA-32 (x86) PC emulator written in C++, that runs on most popular platforms. It includes emulation of the Intel x86 CPU, common I/O devices, and a custom BIOS. Currently, Bochs can be compiled to emulate a 386, 486, Pentium/PentiumII/PentiumIII/Pentium4 or x86-64 CPU including optional MMX, SSEx and 3DNow! instructions. Bochs is capable of running most Operating Systems inside the emulation including Linux, DOS, Windows® 95/98 and Windows® NT/2000/XP or Windows Vista. Bochs was written by Kevin Lawton and is currently maintained by this project.
rdesktop


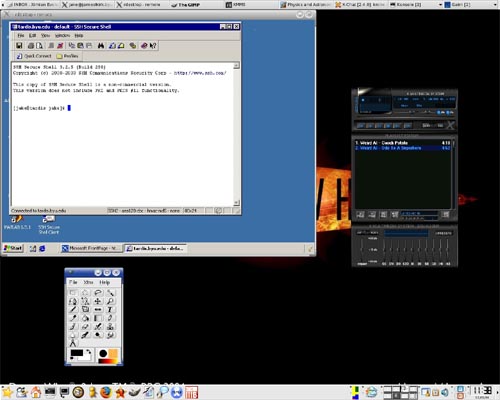
rdesktop is an open source client for Windows Terminal Services, capable of natively speaking Remote Desktop Protocol (RDP) in order to present the user’s Windows desktop. Supported servers include Windows 2000 Server, Windows Server 2003, Windows Server 2008, Windows XP, Windows Vista and Windows NT Server 4.0. Rdesktop currently runs on most UNIX based platforms with the X Window System, and other ports should be fairly straightforward.
XEN
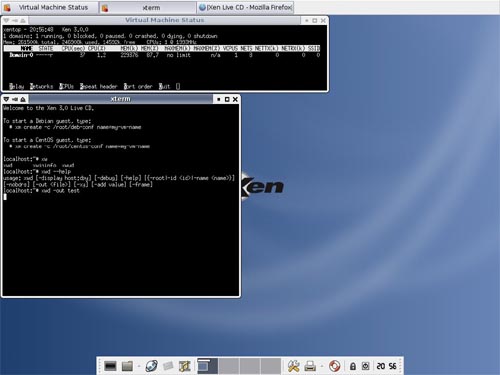
The Xen® hypervisor, the powerful open source industry standard for virtualization, offers a powerful, efficient, and secure feature set for virtualization of x86, x86_64, IA64, PowerPC, and other CPU architectures. It supports a wide range of guest operating systems including Windows®, Linux®, Solaris®, and various versions of the BSD operating systems. The Xen hypervisor is a unique open source technology, developed collaboratively by the Xen community and engineers at over 20 of the most innovative data center solution vendors, including AMD, Cisco, Dell, HP, IBM, Intel, Mellanox, Network Appliance, Novell, Red Hat, SGI, Sun, Unisys, Veritas, Voltaire, and Citrix. Xen is licensed under the GNU General Public License (GPL2) and is available at no charge in both source and object format. Xen is, and always will be, open sourced, uniting the industry and the Xen ecosystem to speed the adoption of virtualization in the enterprise.


Windows Server 2003 MCSE training videos

June 17, 2011


Video Contents:-

01) Windows Server 2003 - Active Directory Installation
02) Windows Server 2003 - Active Directory Users and Computer Management
03) Windows Server 2003 - DHCP Client Configuration
04) Windows Server 2003 - DHCP Server Address Leases
05) Windows Server 2003 - DHCP Server Configuration
06) Windows Server 2003 - DNS Server Configuration
07) Windows Server 2003 - DNS Server Forwarder Configuration
08) Windows Server 2003 - File Server & Shadow Copy
09) Windows Server 2003 - IIS Server Configuration
10) Windows Server 2003 - IIS Server Installation
11) Windows Server 2003 - Logging into an Windows Server 2003 Domain
12) Windows Server 2003 - Mail Server Installation
13) Windows Server 2003 - Mail Server Test
14) Windows Server 2003 - Print Server Configuration
15) Windows Server 2003 - RAS Server Configuration
16) Windows Server 2003 - Streaming Media Server Installation
17) Windows Server 2003 - Streaming Media Server Configuration I
18) Windows Server 2003 - Streaming Media Server Configuration II
19) Windows Server 2003 - Terminal Server Installation
20) Windows Server 2003 - Terminal Server Usage
21) Windows Server 2003 - WINS Server


windows 2003 domain configuration Videos to Download

June 17, 2011

windows 2003 domain configuration Videos to Download


Hi Friends please click on ads if you satisfy's from here......!
Implementing a Two Node Cluster with Windows 2003 Enterprise 2

Implementing a Two Node Cluster with Windows 2003 Enterprise 2

June 11, 2011

Link 1 

Windows 2003 Cluster Setup

I will not explain every step for installing a Windows 2003 Cluster. For detailed information click the following link.
I will show you only a few pictures.

Figure 1: Create a new Cluster
The Windows 2003 Cluster administrator after successful installation.
Figure 2: Cluster Administrator

Exchange 2003 Cluster Setup

Before we install Exchange 2003, we must create a MS-DTC (Distribution Transaction Coordinator) resource.
In Windows 2003, Microsoft recommends installing the DTC as a separate Cluster Group containing a Physical Disk, Network Name and IP address resource and then adding the MSDTC resource to the cluster group.
For more in formation how to setup the MS-DTC in a Windows 2003 Cluster, read the following Knowledge Base article.
The second step is to install Exchange 2003 and all required hotfixes on each node. You MUST install Exchange one after the other. After installing Exchange, you can deploy Exchange 2003 SP1 on every cluster node. For more information on how to deploy Exchange 2003 SP1 into a cluster environment read the following article.
Once the Exchange 2003 binaries have been installed on the cluster Node we can now create an Exchange Virtual Server.
The Exchange Virtual Server creation process is much the same as for Exchange 2003. First we need to create a cluster group for the Exchange Virtual Server. The group must have at least one physical disk resource, at least one IP address resource, and a network name resource. The network name resource must have a dependency on the IP address resources in the cluster group.
When all resources are online, we must create the System Attendant resource. The System Attendant Resource (SA) creates all the other Exchange 2003 cluster resources automatically.
To do this, right click the Exchange 2003 cluster group and choose New Resource and then choose the Microsoft Exchange System Attendant. You must name the SA.

Figure 3: Exchange System Attendant
Add the Nodes that will be possible owners of the System Attendant Resource. A possible owner is a node in the cluster on which the resource can be brought online. These Nodes will also be added as a possible owner of all the other Exchange resources that are automatically created. A Node must be specified as a possible owner of a resource in order for us to failover to that Node.

Figure 4: Possible owners of the EVS
You must set the dependencies on the System Attendant Resource. The dependencies are the following:
  • Network Name resource
  • All disk resources (that Exchange 2003 should use - this includes Mount Point disks which will contain Exchange 2003 data)

Figure 5: SA – Resource dependencies
Like a normal Exchange installation you must select the administrative group where the Exchange virtual server is created.

Figure 6: Chose the administrative Group for the EVS
Within the chosen Administrative Group you now have to choose a Routing Group where the Exchange Virtual Server will be located when more than one Routing Group exists at the time of EVS creation. You can change the server location in the Routing Group after installation.

Figure 7: Select the routing group for the EVS
Please read the wizard's summary carefully.

Figure 8: Exchange 2003 Wizard summary
Click Finish to start the creation process. This may take a while because the setup process actually creates all Exchange 2003 cluster resources. When the process is complete you will see the following message:

Figure 9: DONE
The following picture shows the Cluster Administrator tool after EVS installation. Note that all Exchange resources are NOT online.

Figure 10: Cluster Administrator after EVS installation
Exchange 2003 no longer creates a POP3 and IMAP cluster resource. This is part of Microsoft's Trustworthy initiative and it is also true for a “normal” Exchange 2003 installation.
Next, we have to bring the System Attendant resource online. To do so, right click the EVS System Attendant and click “Bring Online”.

Figure 11: You have to bring the System Attendant Online.

Exchange 2003 Resource dependencies

Microsoft has changed the Exchange 2003 resource dependencies to allow a faster failover/failback.
In Exchange 2000 there are the following dependencies:IP Address > Network Name > System Attendant
Physical Disk > System Attendant
Routing Engine > System Attendant
Information Store  > System Attendant
MTA > System Attendant
MS Search > Information Store
POP3 > Information Store
SMTP > Information Store
IMAP4 > Information Store
Beginning with Exchange 2003 Microsoft has changed the Resource dependencies:IP Address > Network Name > System Attendant
Physical Disk > System Attendant
Routing Engine > System Attendant
Information Store  > System Attendant
MTA > System Attendant
MS Search > System Attendant
POP3 > System Attendant
SMTP > System Attendant
IMAP4 > System Attendant

Link 1 
Implementing a Two Node Cluster with Windows 2003 Enterprise

Implementing a Two Node Cluster with Windows 2003 Enterprise

June 11, 2011

What is a cluster – a definition!

A cluster is a group of computers, called nodes that function as a single computer/system to provide high availability and high fault tolerance for applications or services.  Windows 2003 Servers can participate in a cluster configuration through the use of Cluster Services. If one member of the cluster (the node) is unavailable, the other computers carry the load so that applications or services are always (with a small interruption) available.
All nodes of the cluster use a Shared Disk – an external disk or disk subsystem which is accessible for all nodes through SCSI (2 Nodes) or Fibre Channel (more than 2 nodes). All data will be stored on the shared disk or an external disk subsystem (for example Exchange databases).
Every node has a local Exchange 2003 installation with a unique configuration for every cluster node. Each Cluster with Exchange 2003 has at a minimum one Exchange Virtual Server (EVS). An EVS is the logical node that will be used for all cluster operations. An EVS contains an IP address, network name, physical disk and an application.
A cluster can be …
  • Active/Active or
  • Active/Passive
Microsoft recommends only Active/Passive clusters – I will give you the reason later.
The number of cluster nodes supported by Windows 2003 Enterprise and Datacenter is 8 nodes. Windows Server 2003 Standard and Web Editon doesn’t support a Cluster.
In an Active/Passive cluster - If one node in the cluster fails, the active cluster failover to another node which becomes Active. This is called Failover. If the failed node is back online, a Failback can be manually initiated or automatically configured in the Cluster Group properties.
Every cluster node must have two network interfaces. One network interface for the cluster communication called the private LAN and one network interface called the public LAN. You can link a cluster with two nodes with a simple cross link cable. If more than two nodes exist in the cluster you have to use a dedicated switch / hub.
The private NIC is used for the Heartbeat communication (Cluster communication). A Heartbeat is much like a ping which can be used to test if the other cluster node is still available. If the heartbeat fails, the Failover process occurs.

Clustering changes with Exchange 2003 SP1

In versions before Exchange 2003 SP1, regardless of the number of cluster nodes you could only have one instance of a Public Folder store that is associated with the MAPI folder tree.
In Exchange 2003 SP1, the Exchange development team added the ability to have multiple MAPI Public Folder databases on a single multi node cluster.
This support was added because the Exchange team saw that Outlook 2003 cached mode puts a greater load on Public Folders like the Outlook Address Book (the OAB will be loaded offline at the client). With the help of multiple Public Folder stores the load can be spread across these folders. This allows a better client performance.

Why Active/Active cluster is not recommended

Active / Active cluster is not recommended because of Virtual memory (VM) fragmentation.
When two instances of the information store is running in one memory space, it might be possible that sufficient VM does not exist to bring the resource online during a failover/failback.
For more information see here:
http://support.microsoft.com/default.aspx?scid=kb;EN-US;816893
There are three main concepts which reduce virtual memory fragmentation:
  • Decrease the number of dynamic allocations when the system is started
  • Increase the size of the virtual address space
  • Allocate similar size allocations from common regions of memory

Exchange Server 2003 Cluster Requirements

  • Microsoft Windows 2000 Advanced Server (up to two nodes)
  • Windows 2000 Datacenter Server (up to four nodes)
  • Windows 2000 must have SP3 + 329938 hotfix or SP4
  • Windows Server 2003, Enterprise Edition (up to eight cluster nodes)
  • Windows Server 2003, Datacenter Edition (up to eight cluster nodes)
  • Hardware on cluster HCL
  • Windows 2000 - Check lists for cluster service installation
    http://go.microsoft.com/fwlink/?LinkId=266
  • Windows Server 2003 – http://go.microsoft.com/fwlink/?LinkId=17219
  • Microsoft Distributed Transaction Coordinator (MSDTC) installed

Exchange Server 2003 Cluster Setup Changes

  • Block removal of node if an EVS is running on the cluster
  • The /disasterrecovery switched is blocked
  • Prevent Exchange 2003 from being first non-legacy server in a Exchange 5.5 site
  • By default, POP3 and IMAP4 resource not created (as part of the Trustworthy Computing initiative from Microsoft)
  • Cluster service account doesn’t requires Exchange full admin rights
  • IPSEC is now supported between front-end servers and back-end clusters

Exchange Server 2003 Cluster Disk Changes

Windows 2003 clusters now support Volume Mount points to overcome the limits of traditional drive letter assignments. This new feature is very useful for four and eight node Exchange clusters because the traditional drive letter assignment in Exchange was very limited in cluster environments when multiple storage groups and stores where used.

Windows 2003 Cluster Setup

I will not explain every step for installing a Windows 2003 Cluster. For detailed information click the following link.
I will show you only a few pictures.

Figure 1: Create a new Cluster
The Windows 2003 Cluster administrator after successful installation.

Figure 2: Cluster Administrator

Follow the Link for continuation         
Active Directory database file NTDS.DIT.doc

Active Directory database file NTDS.DIT.doc

February 03, 2011
Downalod My Document

Active Directory database file NTDS.DIT.doc 


Downlaod
Network Problem while installing VPN client.

Network Problem while installing VPN client.

April 09, 2010
Re-join the machine into Domain.
Here is the commands and we need Domain Admin rights to upon 
this commands to re-join the machine into Domain

· netsh int ip reset resetlog.txt          · netsh winsock reset catalog
Windows Server 2003:Best Practices for Enterprise Deployment

Windows Server 2003:Best Practices for Enterprise Deployment

October 10, 2009
Windows Server 2003:Best Practices for Enterprise Deployment


Author: Danielle Ruest and Nelson Ruest
Paperback: 520 pages
Publisher: McGraw-Hill Osborne Media; 1 edition (April 10, 2003)
Language: English
ISBN-10: 007222343X
ISBN-13: 978-0072223439
Format: pdf


Discover the fastest way to migrate to Windows Server 2003 and begin to profit from its enterprise-ready features. Learn how to use the parallel network for migration. Design an Enterprise Network Architecture and follow feature-by-feature implementations. Make the most of Active Directory as an object management environment to remotely configure PCs, servers, users, and groups. This informative resource helps businesses large or small make the most of Windows Server 2003. Its nuts-and-bolts approach is geared toward helping intermediate to advanced users focus on those features most needed for enterprise success.
Plan the architecture of your enterprise network
Prepare for massive installations of Windows Server 2003
Perform a post-installation customization and verification
Build the organizational unit infrastructure to manage PCs, People, and Services
Design Active Directory and Enterprise Network IP Infrastructure
Create an enterprise-ready security environment
Install PCs by coordinating the OU strategy with RIS
Cover specific considerations for all server types, including Network Infrastructure, Application and Dedicated Web servers


Download Here 


How To Monitor for Unauthorized User Access in Windows 2000

How To Monitor for Unauthorized User Access in Windows 2000

June 17, 2009
Summary:

This article describes how to monitor your system for unauthorized user access. There are two main steps: Enabling security auditing and viewing the security logs. Note that different systems have different security needs, and the security topic is complex. Any user who sets up security audits on your system must be assigned to administrative groups or be given security rights and privileges.


How to Enable Security Auditing

You set up security auditing differently depending on whether the computer is a standalone computer or a domain controller.

Standalone Servers, Member Servers, or Windows 2000 Professional

  1. Click Start, click Run, type mmc /a, and then click OK.
  2. On the Console menu, click Add/Remove Snap-in, and then click Add.
  3. Under Snap-in, click Group Policy, and then click Add.
  4. In the Select Group Policy Object box, click Local Computer, click Finish, click Close, and then click OK.
  5. In the Local Computer Policy box, click Computer Configuration, click Windows Settings, click Security Settings, click Local Policies, and then click Audit Policy.
  6. In the details pane, click Audit logon events.
  7. Click Action, click Security, select Unsuccessful logon attempts, and then click OK.

Windows 2000-Based Domain Controllers

  1. Click Start, point to Programs, point to Administrative Tools, and then click Active Directory Users and Computers
  2. In the console tree, click Domain Controllers.
  3. Click Action, and then click Properties.
  4. Click the Group Policy tab, click Default Domain Controllers Policy, and then click Edit.
  5. Click to expand Computer Configuration, Windows Settings, Security Settings, Local Policies, and then Audit Policy.
  6. In the details pane, click Audit logon events.
  7. On the Action menu, click Security, click to select the Define these policy settings check box, click to select the Failure check box, and then click OK.

How to View Security Logs

  1. Click Start, point to Programs, point to Administrative tools, and then click Event viewer.
  2. In the console tree, click Security log.
  3. Look in the details pane for information about the event you want to view, and then double-click the event.

Troubleshooting

  • If your computer is connected to a network, security logging may be restricted or disabled by a network policy.
  • The security log is limited in size; carefully select the events to be audited and consider the amount of disk space you are willing to devote to the security log.
  • If security auditing is enabled on a remote computer, you can view the event logs remotely with Event Viewer. Start a Microsoft Management Console (MMC) console in Author mode, and then add Event Viewer to the console. When you are prompted to specify which computer the snap-in will manage, click Another computer, and then type the name of the remote computer.
  • Security auditing for workstations, member servers, and domain controllers can be enabled remotely only by domain administrators. To do this, create an organizational unit, add the appropriate machine accounts to the organizational unit, and then use Active Directory Users and Computers to create a policy to enable security auditing.
How to determine whether users changed their passwords before an account lockout

How to determine whether users changed their passwords before an account lockout

June 17, 2009
Summary :

This step-by-step article describes how to determine whether users changed their passwords before an account lockout. You may want to configure an audit account management policy to determine whether users changed their passwords before an account lockout occurred. This policy may be useful when users forget their new passwords, or when users continue to use their old passwords.


Audit Account Management in Microsoft Windows 2000 Server and Windows Server 2003

  1. Click Start, and then click Run.
  2. In the Open box, type mmc, and then click OK.
  3. On the Console menu, click Add/Remove Snap-in, and then click Add.
  4. In the Add Standalone Snap-in dialog box, click Group Policy, click Add, click Finish, click Close, and then click OK.
  5. Double-click Local Computer Policy, and then double-click Computer Configuration.
  6. Double-click Windows Settings, and then double-click Security Settings.
  7. Double-click Local Policies, and then double-click Audit Policy.
  8. In the right pane, double-click Audit account management.
  9. In the Local Security Policy Setting dialog box, click to select the Success and the Failure check boxes, and then click OK.
  10. Click Start, point to Programs, point to Administrative Tools, and then click Event Viewer.
  11. Click Security Log, and then in the right pane, double-click Success Audit or Failure Audit.


Audit Account Management in Microsoft Windows NT 4.0

  1. Click Start, point to Programs, point to Administrative Tools, and then click User Manager for Domains.
  2. Click Policies on the menu bar, and then click Audit.
  3. Click Audit These Events.
  4. Click to select the Failure check box for the Logon and Logoff event.
  5. Click to select the Success and the Failure check boxes for the User and Group Management event, and then click OK.
  6. Click Start, point to Programs, point to Administrative Tools, and then click Event Viewer.
  7. Click Log on the menu bar, and then click Security.
*******************************************************
The following is an example an account management event:


Event Type: Success Audit
Event Source: Security
Event Category: Account Management
Event ID: 642 Date: 8/12/2008
Time: 3:13:33 PM
User: CONTOSO\administrator
Computer: CONTOSO-DCB
Description: User Account Changed:
Target Account Name: t
Target Domain: CONTOSO
Target Account ID: CONTOSO\t
Caller User Name: administrator
Caller Domain: CONTOSO
Caller Logon ID: (0x0,0x233FF)
Privileges: -
Changed Attributes:
Sam Account Name: -
Display Name: - User
Principal Name: -
Home Directory: -
Home Drive: -
Script Path: -
Profile Path: -
User Workstations: -
Password Last Set: 8/12/2008 3:13:33 PM
Account Expires: -
Primary Group ID: -
AllowedToDelegateTo: -
Old UAC Value: -
New UAC Value: -
User Account Control: -
User Parameters: -
Sid History: -
Logon Hours: -
**************************************************
How to track users logon/logoff

How to track users logon/logoff

June 17, 2009

The Auditing


Option 1:

1. Enable Auditing on the domain level by using Group Policy:

Computer Configuration/Windows Settings/Security Settings/Local Policies/Audit Policy

There are two types of auditing that address logging on, they are Audit Logon Events and Audit Account Logon Events.

Audit "logon events" records logons on the PC(s) targeted by the policy and the results appear in the Security Log on that PC(s).

Audit "Account Logon" Events tracks logons to the domain, and the results appear in the Security Log on domain controllers only


2. Create a logon script on the required domain/OU/user account with the following content:

echo %date%,%time%,%computername%,%username%,%sessionname%,%logonserver% >>
\\SERVER\SHARENAME$\LOGON.LOG

3. Create a logoff script on the required domain/OU/user account with the following content:

echo %date%,%time%,%computername%,%username%,%sessionname%,%logonserver% >>
\\SERVER\SHARENAME$\LOGOFF.LOG


Note: Please be aware that unauthorized users can change this scripts, due the requirement that

the SHARENAME$ will be writeable by users.


++++++++++++++++++++++++++++++++++++++++++++++++++++++++++++++++++++

Option 2:


Use WMI/ADSI to query each domain controller for logon/logoff events.