How to install Turbo C++ on Windows 7

How to install Turbo C++ on Windows 7

October 07, 2011

We are providing detailed procedure how to install Turbo C++ on Windows 7.

Users having Win 7 Proand Win 7 Ultimate should use the virtual Windows XP Mode to install Turbo C++.
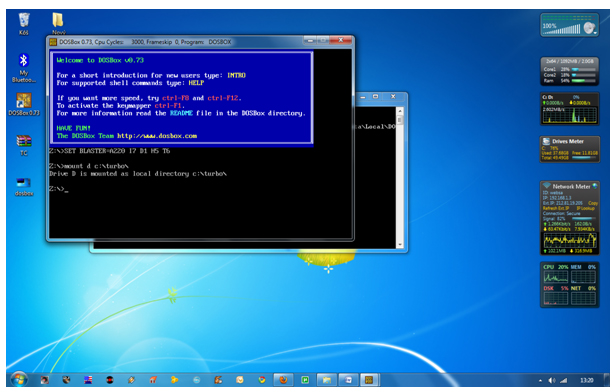
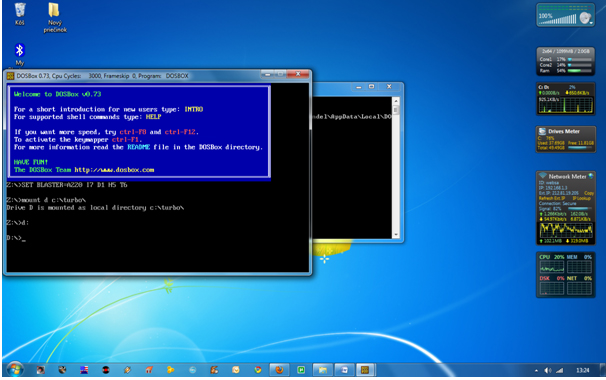
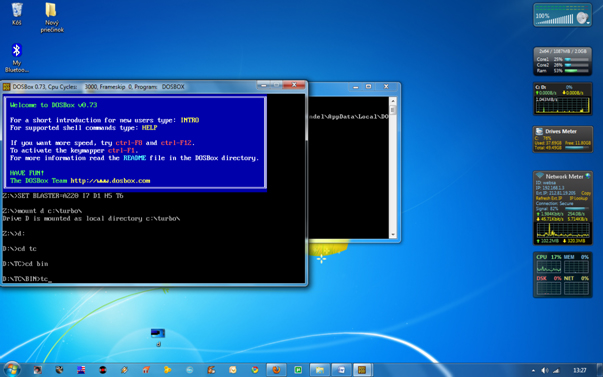
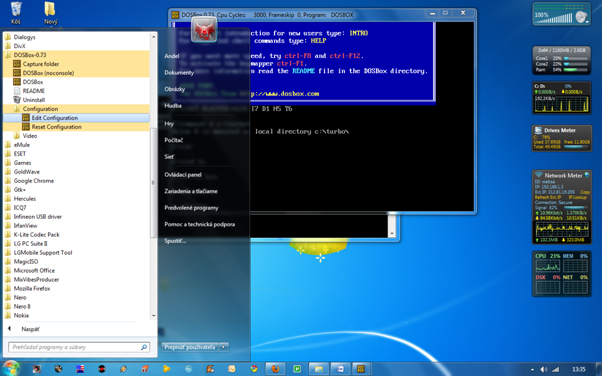
Installing Turbo C++ on Windows 7

1. Extract the zip files to: e.g. C:\TurboC


Extract zip files
2. Run the install: C:\TurboC\INSTALL.EXE


Run the install
3. Press Enter to continue


Press Enter to continue
4. Enter the Source drive: e.g.C and press Enter to continue


Enter the Source drive

5. Enter the Source path: \TURBOC and press Enter to continue


Enter the Source path
6. In directories specify where Turbo C files are copied. E.g. C:\TC . When done go to start instalation and press Enter


Specify where Turbo C++ files are copied
7. Succesfull instalation


Succesfull instalation

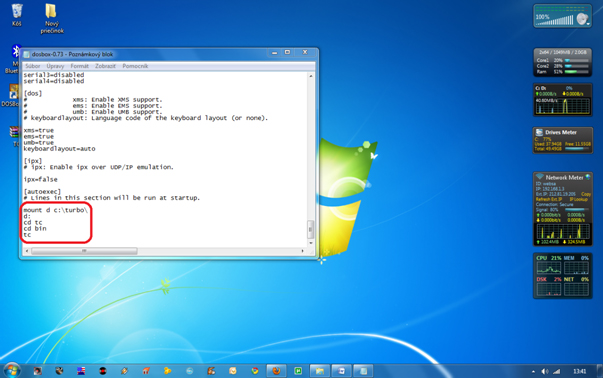
8. First launch from your destination e.g. C:\TC\BIN\TC.EXE
How to install Turbo C++ on Windows 7 64bit

How to install Turbo C++ on Windows 7 64bit

October 07, 2011

Providing step-by-step procedure how to install Turbo C++ on 64 bit Windows 7.

1. Install the software DOSBox ver 0.73 : download here

2. Create a folder,for example „Turbo“ (c:\Turbo\)

3. Download and extract TC into the Turbo folder (c:\Turbo\): download here

4. Run the DOSBox 0.73 from the icon located on the desktop:


5. Type the following commands at the command prompt [Z]: mount d c:\Turbo\ [The folder TC is present inside the folder Turbo]

Now you should get a message which says: Drive D is mounted as a local directory c:\Turbo\


6. Type d: to shift to d:


7. Next follow the commands below:

cd tc
cd bin
tc or tc.exe [This starts you the Turbo C++ 3.0]


8. In the Turbo C++ goto Options>Directories> Change the source of TC to the source directory [D] ( i.e. virtual D: refers to original c:\Turbo\ . So make the path change to something like D:\TC\include and D:\TC\lib respectively )

How to start TurboC++ in the DOSBox automatically:

You can save yourself some time by having DOSBox automatically mount your folders and start TurboC++:
For DOSBox versions older then 0.73 browse into program installation folder and open the dosbox.conf file in any text editor. For version 0.73 go to Start Menu and click on “Configuration” and then “Edit Configuration“. Then scroll down to the very end, and add the lines which you want to automatically execute when DOSBox starts.

Automatically mount and start Turbo C++3.0 in DOSBox ver 0.73:


Scroll down to the very end, and add the lines:


Those commands will be executed automatically when DOSBox starts!

Please note:

Full screen: Alt and Enter

When you exit from the DosBox [precisely when u unmount the virtual drive where Turbo C++ 3.0 has been mounted] all the files you have saved or made changes in Turbo C++ 3.0 will be copied into the source directory(The directory which contains TC folder)

Don’t use shortcut keys to perform operations in TC because they might be a shortcut key for DOSBOX also . Eg : Ctrl+F9 will exit DOSBOX rather running the code .

VIDEO tutorial (there is another setup – original path to Turbo C++ is h:\tc\ and drive H is mounted as drive C:)
Windows Server 2008 R2 Evaluation Virtual Hard Drive Images for Hyper-V (180 Days)

Windows Server 2008 R2 Evaluation Virtual Hard Drive Images for Hyper-V (180 Days)

September 14, 2011


Windows Server 2008 R2 Evaluation Virtual Hard Drive Images for Hyper-V (180 Days)


Files in this download

The links in this section correspond to files available for this download. Download the files appropriate for you.
Windows Server 2008 R2 Enterprise Evaluation (Full Edition).exe
1.0 GB DOWNLOAD

Windows Server 2008 R2 Enterprise Evaluation (Full Edition).part01.exe
500.0 MB DOWNLOAD

Windows Server 2008 R2 Enterprise Evaluation (Full Edition).part02.rar
500.0 MB DOWNLOAD

Windows Server 2008 R2 Enterprise Evaluation (Full Edition).part03.rar
500.0 MB DOWNLOAD

Windows Server 2008 R2 Enterprise Evaluation (Full Edition).part04.rar
500.0 MB DOWNLOAD
Windows Server 2008 R2 Enterprise Evaluation (Full Edition).part05.rar
37.0 MB DOWNLOAD
Windows Server 2008 R2 Enterprise Evaluation (Server Core).exe 
706.0 MB DOWNLOAD

Overview

The Microsoft VHD format is the common virtualization file format for Hyper-V that provides a uniform product support system, and provides more seamless manageability, security, reliability and cost-efficiency for customers.

This VHD release is available in English only and is for evaluation and testing purposes. Evaluating any version of Windows Server 2008 R2 software does not require entering a product key, however will require activation within 10 days. Failing to activate the evaluation will cause the licensing service to shut the machine down every hour (The 10 day activation period can be reset four (4) times by using the rearm command. See below for further information on activation rearm). Once activated, the evaluation will run for 180 days. After this time, you will need to uninstall the evaluation software and reinstall a fully-licensed version of Windows Server 2008 R2.

As this installation requires Hyper-V, you will need to have a base install of Windows Server 2008 (64-bit edition) or Windows Server 2008 R2, running Hyper-V. For more information on obtaining and installing the latest version of Hyper-V, please visit the Hyper-V Homepage.

Both virtual machines available here are running Windows Server 2008 R2 Enterprise Edition Evaluation. One is the default full installation, and the other has been configured as a default Core installation. For more information on the difference between full and core installation please see the Windows Server 2008 Editions Overview pages. For download options please see the IMAGE SELECTION section in the instructions below.

As both virtual machines do not have anti-virus installed, they should not be connected to any network until it has anti-virus installed.

System requirements

Supported Operating Systems: Windows Server 2008 R2
Required Software: Windows Sever 2008 or Windows Server 2008 R2 installed with Hyper-V*
Processor: 2.0 GHz or faster (x64) Hardware Assisted Virtulization Required
Disk Space: At least 10.0 GB of free disk space
RAM: 2.5 GB of available physical RAM**

*The VM images themselves are 64bit images and as such you will need to determine 32bit application compatibility for the applications you may wish to install.

* *The amount of physical RAM depends on what applications are running on the Server. You can use the Task Manager to identify how much physical RAM is available on your machine. Running applications other than Hyper-V will consume available physical RAM.

Instructions

Using the Windows Server 2008 R2 VHD with Hyper-V
  1. On your computer, install Windows Server 2008 or Windows Server 2008 R2 and Microsoft Hyper-V. Detailed instructions on how to install the latest version of Microsoft Hyper-V can be found here: http://www.microsoft.com/windowsserver2008/virtualization/install.mspx
  2. Download the files required. There are 2 different images (Windows Server 200 R2 Enterprise Full Installation and Windows Server R2 Enterprise Server Core Installation), and 2 ways to download them based on your current internet connection – see IMAGE SELECTION section below for further information.
  3. When you have installed Hyper-V and extracted the VHD files, copy the VHD file to a pre-selected location (recommended default location C:\Users\Public\Documents\Microsoft Hyper-V\Virtual Hard Disks)
  4. Open Hyper-V Manager. Click Start, point to Administrative Tools, and then click Hyper-V Manager.
  5. From the Action pane, click New, and then click Virtual Machine.
  6. From the New Virtual Machine Wizard, click Next.
  7. On the Specify Name and Location page, specify what you want to name the virtual machine and where you want to store it. (you can keep this as default location for ease).
  8. On the Memory page, specify enough memory to run the guest operating system you want to use on the virtual machine (Recommendation at least 2Gb).
  9. On the Networking page, connect the network adapter to an existing virtual network if you want to establish network connectivity at this point.
  10. On the Connect Virtual Hard Disk page, select “Use and existing virtual hard disk”, and browse to the location you copied the VHD file to in step 3 above.
  11. Select finish (you can also start the VHD at this time, however we recommend you create a snapshot before you start the VHD for the first time).
  12. To logon to the machine, use the following credentials:
    • Username: administrator, password: Pass@word1 (Administrator account)

IMAGE SELECTION

To make is easier to download the VHD images, we have created 2 different ways to download the files. You have the choice of downloading the entire compressed files as one image, or as a multi-part archive (All images are self-extracting archives). Below is the session legend (you can also download these files by right-clicking on them and saving them to your system).

Windows Server 2008 R2 Enterprise Evaluation (Full Edition)

Single Image
  1. Windows Server 2008 R2 RC Enterprise Evaluation (Full Edition)
Multi-part Image
  1. Windows Server 2008 R2 Enterprise Evaluation (Full Edition).part01.exe
  2. Windows Server 2008 R2 Enterprise Evaluation (Full Edition).part02.rar
  3. Windows Server 2008 R2 Enterprise Evaluation (Full Edition).part03.rar
  4. Windows Server 2008 R2 Enterprise Evaluation (Full Edition).part04.rar
  5. Windows Server 2008 R2 Enterprise Evaluation (Full Edition).part05.rar

Windows Server 2008 R2 Enterprise Evaluation (Server Core)

Single Image Only
  1. Windows Server 2008 R2 Enterprise Evaluation (Server Core).exe

Additional information

Please refer to the documents below for further information

  • Installing Windows Server 2008 R2


  • Windows Server 2008 R2 Release Notes


  • How to manually rearm the 10 day activation grace period
    When the initial 10-day activation period nears its end, you can run the Slmgr.vbs script to reset it back to 10 days. To do this, follow these steps:

  • 1. Click Start, and then click Command Prompt.


  • 2. Type slmgr.vbs -dli, and then press ENTER to check the current status of your activation period.


  • 3. To reset the activation period, type slmgr.vbs –rearm, and then press ENTER.


  • 4. Restart the computer.


  • This resets the activation period to 10 days, and can be used up to four times. After this you will need to either activate or reinstall 
    How to install Windows Server 2008 without activating it and extend the evaluation period

    How to install Windows Server 2008 without activating it and extend the evaluation period

    September 14, 2011

    How to install Windows Server 2008 without activating it

    1. Run the Windows Server 2008 Setup program.
    2. When you are prompted to enter a product key for activation, do not enter a key. Click No when Setup asks you to confirm your selection.
    3. You may be prompted to select the edition of Windows Server 2008 that you want to evaluate. Select the edition that you want to install.

      Note After Windows Server 2008 is installed, the edition cannot be changed without reinstalling it.
    4. When you are prompted, read the evaluation terms in the Microsoft Software License Terms, and then accept the terms.
    5. When the Windows Server 2008 Setup program is finished, your initial 60-day evaluation period starts. To check the time that is left on your current evaluation period, run the Slmgr.vbs script that is in the System32 folder. Use the -dli switch to run this script. The slmgr.vbs -dli command displays the number of days that are left in the current 60-day evaluation period.

    How to manually extend the evaluation period

    When the initial 60-day evaluation period nears its end, you can run the Slmgr.vbs script to reset the evaluation period. To do this, follow these steps:
    1. Click Start, and then click Command Prompt.
    2. Type slmgr.vbs -dli, and then press ENTER to check the current status of your evaluation period.
    3. To reset the evaluation period, type slmgr.vbs –rearm, and then press ENTER.
    4. Restart the computer.
    This resets the evaluation period to 60 days.

    How to automate the extension of the evaluation period

    You may want to set up a process that automatically resets the evaluation period every 60 days. One way to automate this process is by using the Task Scheduler. You can configure the Task Scheduler to run the Slmgr.vbs script and to restart the server at a particular time. To do this, follow these steps:
    1. Click Start, point to Administrative Tools, and then click Task Scheduler.
    2. Copy the following sample task to the server, and then save it as an .xml file. For example, you can save the file as Extend.xml.


      2007-09-17T14:26:04.433
      Microsoft Corporation


      P31D
      false

      2007-10-05T02:23:24
      2008-09-17T14:23:24.777
      true


      domain\alias
      Password
      HighestAvailable


      PT10M
      PT1H
      true
      false

      IgnoreNew
      true
      true
      true
      false
      false
      true
      true
      false
      false
      true
      P3D
      PT0S
      7

      PT1M
      3


      C:\Windows\System32\slmgr.vbs
      -rearm


      C:\Windows\System32\shutdown.exe
      /r


    3. In the sample task, change the value of the following “UserID” tag to contain your domain and your alias:
      domain\alias
    4. In the Task Scheduler, click Import Task on the Action menu.
    5. Click the sample task .xml file. For example, click Extend.xml.
    6. Click Import.
    7. Click the Triggers tab.
    8. Click the One Time trigger, and then click Edit.
    9. Change the start date of the task to a date just before the end of your current evaluation period.
    10. Click OK, and then exit the Task Scheduler.
    The Task Scheduler will now run the evaluation reset operation on the date that you specified.
    How to make bootable pen drive with iso image

    How to make bootable pen drive with iso image

    September 13, 2011
    1. Download and install UltraISO trial.

    2. Plug in your pen drive.

    3. Open UltraISO as Administrator (right-click shortcut, "Run as Administrator")

    4. Open the CD/DVD image file you want to write to pendrive in this instance of UltraISO (File>Open).

    5. Under the Bootable menu, select Write Disk Image.

    6. A new dialog should open up, listing your pen drive(s).

    7. Select the pendrive you want to write your image to.

    8. Set the Write Method to USB-HDD (or USB-HDD+ if your BIOS supports it).

    9. Click the Write button, and then click Yes/OK in the warning dialog (All data on this drive will be destroyed ....... do you want to continue) that pops up.

    8. relax and enjoy the Tip.


    Download Link For UltraISO
    August 22, 2011


    Video Contents:-

    01) Windows Server 2003 - Active Directory Installation
    02) Windows Server 2003 - Active Directory Users and Computer Management
    03) Windows Server 2003 - DHCP Client Configuration
    04) Windows Server 2003 - DHCP Server Address Leases
    05) Windows Server 2003 - DHCP Server Configuration
    06) Windows Server 2003 - DNS Server Configuration
    07) Windows Server 2003 - DNS Server Forwarder Configuration
    08) Windows Server 2003 - File Server & Shadow Copy
    09) Windows Server 2003 - IIS Server Configuration
    10) Windows Server 2003 - IIS Server Installation
    11) Windows Server 2003 - Logging into an Windows Server 2003 Domain
    12) Windows Server 2003 - Mail Server Installation
    13) Windows Server 2003 - Mail Server Test
    14) Windows Server 2003 - Print Server Configuration
    15) Windows Server 2003 - RAS Server Configuration
    16) Windows Server 2003 - Streaming Media Server Installation
    17) Windows Server 2003 - Streaming Media Server Configuration I
    18) Windows Server 2003 - Streaming Media Server Configuration II
    19) Windows Server 2003 - Terminal Server Installation
    20) Windows Server 2003 - Terminal Server Usage
    21) Windows Server 2003 - WINS Server

    https://encrypted-tbn3.google.com/images?q=tbn:ANd9GcShurbZ4-kiYc-oHyeDl_erOtslubdOCT2C4ZVTfOKJ9n7O-YOH
    Enable TSM and SSH on ESXi 4.1

    Enable TSM and SSH on ESXi 4.1

    August 20, 2011

    I’ve installed the VMware ESXi 4.1 on my home lab for learning purpose.
    Today I decided to enable SSH on ESXi 4.1 for further use and also check the TSM (Tech Support Mode) on ESXi 4.1 in order to checking the different area on the ESXi itself.
    So as usual I pressed the ALT+F1 and …. there is new message from VMware on this page!?
    Tech Support Mode has been disabled by administrator.


    So I went back to the main page for checking any new changes in the “System Customization” page.
    There is new item in menu as “Troubleshooting Options” which contain four useful option which I think would make the administrator work more easier and safer.
    By entering in this menu administrators would be able to enable/disable TSM and SSH, Setting a customized time for disabling the TSM as well as restarting the management agents.
    Enabling TSM
    Disabling TSM
    The result of enabling the TSM
    Enabling SSH
    Disabling SSH
    Modifying Tech Support timeout
    Configuring this option would let administrators to let the other technician or support group to gain access to this host for the specific period of time and prevent some mistake like forgetting to disable the TSM.
    Using Tech Support Mode in ESXi 4.1

    Using Tech Support Mode in ESXi 4.1

    August 20, 2011

    Using Tech Support Mode in ESXi 4.1

    Purpose

    This article provides guidance on the recommended use of Tech Support Mode for VMware ESXi 4.1.

    For instructions on how to enter Tech Support Mode for VMware ESXi 4.0 and 3.5, see: Tech Support Mode for Emergency Support (1003677).

    Resolution


    Tech Support Mode

    Tech Support Mode (TSM) provides a command-line interface that can be used by the administrator to troubleshoot and correct abnormal conditions on VMware ESXi hosts. TSM can be accessed in two ways:
    • Logging in directly on the console of the ESXi server

    • Logging in remotely via SSH

    Both of these methods can be disabled, and an optional timeout value can be configured to disallow local and remote TSM access after the specified timeout period.
     
    Note: Any existing open sessions are not automatically terminated at the end of the timeout period.

    Using Tech Support Mode

    Tech Support Mode is provided for the purposes of troubleshooting and remediation. VMware support may provide directions to use TSM in many forms including but not limited to telephone, E-mail, knowledge base articles, documentation, and remote desktop.

    VMware recommends using the vSphere Client or any other VMware Administration Automation Product to perform routine ESXi host configuration tasks that do not involve a troubleshooting scenario. For scripting and automation, VMware recommends using the vCLI, PowerCLI, or the vSphere SDK instead of TSM.

    TSM may be required to test and debug pre, post, or first boot scripts that are used in conjunction with the new ESXi 4.1 scripted installation feature. VMware recommends limiting testing and debugging these scripts to non-production environments prior to roll-out into production.

    Enabling and Accessing Tech Support Mode

    To enable local or remote TSM from the Direct Console User Interface (DCUI):
    1. At the DCUI of the ESXi host, press F2 and provide credentials when prompted.

    2. Scroll to Troubleshooting Options, and press Enter.

    3. If you want to enable local TSM, select Local Tech Support and press Enter once. This allows users to login on the virtual console of the ESXi host.

      If you want to enable remote TSM, select Remote Tech Support (SSH) and press Enter once. This allows users to login via SSH on the virtual console of the ESXi host.

    4. Optionally, if you want to configure the timeout for TSM:

      1. Select Modify Tech Support timeout and press Enter.

      2. Enter the desired timeout value in minutes and press Enter.


    5. Press Esc three times to return to the main DCUI screen.


    To enable local or remote TSM from the vSphere Client:
    1. Select the host and click the Configuration tab.

    2. Click Security profile > Properties.

    3. Click Local Tech Support or Remote Tech Support (SSH) and click Options.

    4. Choose the desired startup policy and click Start, then click OK.

    5. Verify that the daemon selected in step 3 shows as running in the Services Properties window.


    To configure the TSM timeout value using the vSphere Client:
    1. Select the host and click the Configuration tab.

    2. Click Advanced Settings.

    3. Change the UserVars.TSMTimeOut field to the desired value in minutes.

    4. Click OK.


    To access the local TSM:
    1. At the main DCUI screen, press ALT+F1 simultaneously. This opens a virtual console window to the host.

    2. Provide credentials when prompted.

      Note: When typing the password, characters are not displayed on the console.


    To access the remote TSM:
    1. Open an SSH client.

    2. Specify the IP address or domain name of the ESX host.

      Notes:

      • Directions may vary depending on what SSH client you are using. For more information, consult vendor documentation and support.

      • By default, SSH works on TCP port 22.


    3. Provide credentials when prompted.

    The Benefits of Using Gmail with Microsoft Outlook

    The Benefits of Using Gmail with Microsoft Outlook

    August 09, 2011
    Ever since Google added IMAP support in Gmail, I have almost stopped visiting the Gmail website and manage all my email inside Microsoft Outlook.
    Though Outlook with Gmail IMAP can sometimes become painfully slow, there are still plenty of reasons to continue using Outlook as a Gmail Message Reader - you get less spam, more storage space and more.
    1. Get more storage space in Gmail
    gmail deleted email
    Microsoft Outlook lets you search emails based on the size of the message.
    Therefore you can easily discover emails that clog your Gmail Inbox and delete them inside Outlook -the bulky message will immediately disappear from Gmail servers too.
    Cleaning up the inbox was extremely inconvenient when Gmail provided only POP3 access.
    outlook gmail spam 2. Double Protection from Spam
    Gmail spam filters are excellent but not perfect so spam can still sneak into your Inbox.
    Now Microsoft too provides their own junk email filters in Outlook so the chances are very high that spam which manages to fool Gmail will get caught by Outlook Junk email filters.
    Google and Microsoft are technically not working together to build a common email spam management solution but with Outlook and Gmail, you indirectly get the best of both worlds.
    gmail linkedin 3. Learn About the Sender from LinkedIn
    The excellent LinkedIn Toolbar for Outlook adds a small "info" link to each of your email messages.
    You can hover the mouse over this link to learn more about sender of the email provided he or she has a profile on LinkedIn.
    Once you start using this LinkedIn feature in Outlook, you'll almost get addicted to it. Sometimes I find it more efficient than Googling a person's name.
    4. Right-Click and Block Email Senders
    block gmail in outlookThough you can create rules in Gmail to automatically route email to the Trash or Spam folder, Outlook makes it all the more simple - you can right click any email message and say "Add Sender to Blocked Senders List".
    Alternatively, you can block email from entire web domains (abc.com) or Top Level Domains (like .ru or .cn) in simple steps.
    Related: Effective Gmail Search Commands
    5. Import pictures of your Outlook/Gmail Contacts from Facebook
    This is one of my favorites - you get an email in Gmail, it downloads to your Outlook account, you add that person to your address book and then import his/her photograph, website URL and other details from Facebook using any of the Facebook-Outlook sync services.
    You can then sync your Outlook contacts with your BlackBerry or other smart phones. Very useful.
    Please Click any of the following link


    Bonus Tip: You don't need any hacks for creating rich email signatures in Gmail - Outlook will do that for you.
    Easily Transfer Emails from Hotmail to Gmail Via Outlook Connector

    Easily Transfer Emails from Hotmail to Gmail Via Outlook Connector

    August 09, 2011

    Make that switch from Windows Live Hotmail to Gmail but the problem is how to move old Hotmail email messages and folders to the new Gmail address ? Hotmail doesn't support IMAP or POP3 and it will take years to manually forward individual emails from Hotmail to Gmail.
    move emails from hotmail to gmail
    No worries, there's a wonderful solution that costs $0 and comes from Microsoft itself - its the Office Outlook connector and works with Outlook 2003 and Outlook 2007.

    Here's a step by step guide on moving emails from Hotmail to Gmail via Outlook:
    1. Install the Outlook connector and then configure your MSN Hotmail / Windows Live Hotmail accounts with Outlook.
    2. Once you have all your Hotmail email message available locally inside Outlook, configure Gmail IMAP access inside Outlook.
    3. Now copy or just drag-n-drop the Hotmail folders (downloaded in Step 1) over your Gmail Inbox folder in Outlook. Its the same migration procedure as described in a previous tutorial - Backup Outlook Email to Gmail.
    As your Outlook synchronizes with Gmail, all your Hotmail messages will become available inside Gmail as well. And if you have multiple Hotmail accounts, this trick will help you consolidate email messages from all those account at one place.
    Please Click any of the following link


    Export and Backup Emails from Outlook to Gmail Online

    Export and Backup Emails from Outlook to Gmail Online

    August 09, 2011


    Looking for a trick to archive all Outlook email messages (and folders) to his online Gmail account for two reasons - one is secure backup and two, he will be able toaccess his old emails from any computer.
    gmail-outlook-backup
    Solution: It is quite easy to transfer Outlook emails to your Gmail mailbox. Here's a step by step guide:
    Step 1: Enable IMAP in your Gmail account and then configure Outlook (or Outlook Express or Windows Live Mail) to sync with your Gmail address via IMAP. Read this guide.
    archive-pstStep 2: Import your Outlook PST file into a Personal folder that is different from your default Gmail Inbox.
    To import, click File -> Import And Export -> Import from another program or file. -> Next -> Personal Folder File (.pst) -> Next.
    Select the PST file that contains your email, then pick the email folders that you want to import in Outlook and clickFinish.
    Step 3: Select the Personal folders that you want to backup online and copy them your Gmail Folder in Outlook (see screenshot).
    In the Folder List, right-click the folder you want to copy and click Copy Folder name. Click the Gmail Folder in Outlook to copy that folder in that location. You can repeat the steps as needed for other folders.
    copy-outlook-folderThat's it. Your Outlook email will soon become available inside your online Gmail Inbox.
    If your switching from Hotmail to Gmail, check this tutorial on moving emails from Hotmail to Gmail.
    Caution: The migration from Outlook to Gmail can take a long time if you have very large Outlook pst file or if your internet connection speed is slow. Therefore, consider removing all large emails before moving them to your Gmail via IMAP.
    Please Click any of the following link